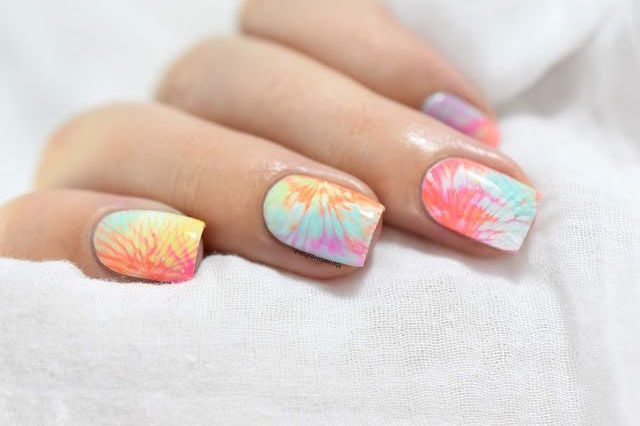
Say hello to Spring with these totally on-trend, tie-dye nails.
Join trend-setting A-listers Gigi Hadid and Kylie Jenner by perfecting the art of nail art with our ultimate guide to tie-dye nails below.
With DIY tie-dye taking over the fashion world this year, it was only a matter of time before this colourful trend found its way into the beauty industry.
Tie-dye nails are the hottest nail look at the moment and with Spring right around the corner, there is no better time to master this surprisingly easy design at home.
Tie-Dye Skies
For a cloudy, marble finish, these nails are the perfect way to dip your toe into the world of tie-dye.
The pastels work seamlessly together to create a subtler tie-dye look and because the colours are softer, and easily blended-together there is less room for you to mess up.
When done the right way, these nails can take a simple, classy look to a whole new level of aesthetic.
Equipment:
- White nail polish
- 3-4 pastel-coloured nail polishes
- A sponge
- A clear top coat
- Nail tape
Method:
- Tape the skin around your nails to prevent mess.
- Apply white nail polish as a base coat.
- Paint patches of each colour (including white) onto a sponge.
- Dab sponge onto nail and let dry.
- Apply a clear top coat.
- Let dry and peel off tape.
Psychedelic Swirls
The psychedelic swirl pattern is definitely a conversation-starter.
For a unique, late-60s to early-70s pop of colour, find the brightest neon nail polishes you can and get ready to have your nails complimented everywhere you go.
These bold tie-dye nails are not for the faint-hearted so whether you choose to do a whole set or settle on a few statement nails, we advise you to pick your colours wisely.
Equipment:
- A clear base coat
- 3-4 neon-coloured nail polishes
- A toothpick
- Nail art brush set (one brush for each colour)
- A clear top coat
Method:
- Apply base coast and let dry.
- Using a thin nail art brush, apply the first colour from the centre, painting a spiral towards the outer edges of the nail.
- Repeat with other colours until nail is fully covered.
- Use a tooth pick to draw a line from the centre, pulling outwards.
- Repeat around the nail as desired.
- Let dry.
The best part about tie-dye nails, are the endless possibilities of what colours to pick and designs to do.
Here are some of our favourite takes on tie-dye nails to spark your inspiration:

